We are expanding
our material know-how
and test services with
the DEKRA laboratories!
Find out more in our
press release.
News:
Titanium alloys and titanium purity of medical instruments and implants according to
Accredited test laboratory
for materials testing, product testing & failure analysis.
Your specialist for metals,
plastics, elastomers.
We are expanding
our material know-how
and test services with
the DEKRA laboratories!
Find out more in our
press release.
News:
Titanium alloys and titanium purity of medical instruments and implants
according to DIN EN ISO 832
Accredited test laboratory
to DIN EN ISO / IEC 17025.
Your specialist for metals,
plastics, elastomers.
Cross cut test according to DIN EN ISO 2409.
The cross-cut test is a simple method and is used to determine the adhesive strength and elasticity of single to multi-layer coatings. The condition of a coating (e.g. protective varnish) plays a decisive role in maintaining product quality. The better the coating adheres to the substrate, the more reliable the protective effect.
The cross-cut method assesses how the coating behaves in the event of damage and shear stress. The test is not suitable for layer thicknesses of more than 250 µm and for structured surfaces with greater layer thicknesses. Since the cross-cut is a destructive test, the process is only carried out in defined areas on the component or on sample parts at the beginning of the project.
Sequence of a cross-cut test.
A grid is scratched into the coating to be tested. Depending on the area of application, coating properties and substrate material, the standard recommends different cutting tools, numbers and spacing of cuts.
After a successful cross-cut test, the cutting directions are cleaned with a soft brush. As a rule, especially in the automotive industry, an adhesive tape defined in the standard is additionally stuck onto the cutting grid with a finger, applying light pressure. The adhesive tape is then removed with an even peeling movement.
The test is evaluated visually with the eye by comparing the sectional raster image with the reference images from DIN EN ISO 2409. A cross-cut characteristic is assigned according to the number of squares that have flaked off and the appearance. Depending on the condition of the damage, a distinction is made between cross-cut parameters from 0 (very good adhesive strength) to 5 (very poor adhesive strength), abbreviated Gt 0 to Gt 5.
Further studies of surface coatings.
In addition to standardized methods such as color, gloss and roughness measurements, there are further options for surface characterization in order to be able to make statements about individual parameters or causes of failure of surfaces.
In order to get to the bottom of adhesion problems of coated parts, for example, we carry out further examinations on the scanning electron microscope. In comparison to the light microscope, we can display surfaces with higher magnifications (layers ≤ 1 µm) and a surface structure with a large depth of field.
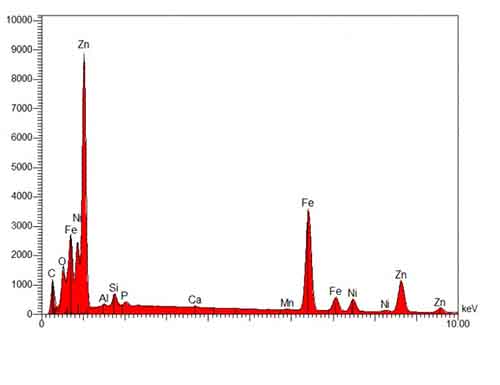
In addition, the EDX analysis unit on the SEM can be used to make qualitative and semi-quantitative statements about the elementary composition of the surface coating. With an EDX analysis, elements with an atomic number of 6 (carbon) are detected. Elements such as hydrogen are not taken into account, which means that organic substances are only recorded to a limited extent.
The detection limit depends strongly on the atomic weight of the element under investigation and is between 0.1 and 0.5 percent by weight for the predominant elements.
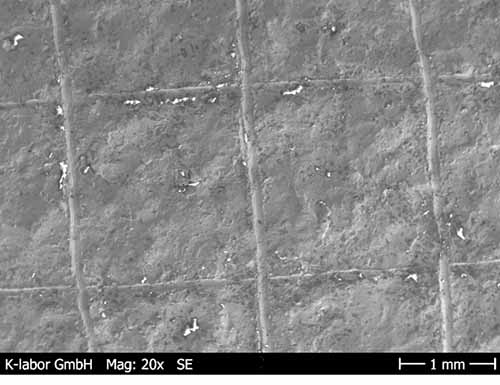
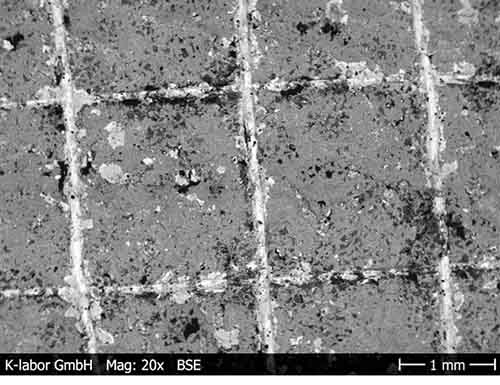
Case study: Cross-cut on the component with subsequent SEM examination and EDX analysis:

Figure 1: View of a cross-section on the component (SE contrast)

Figure 2: View of a cross-cut on the component (BSE contrast)


