We are expanding
our material know-how
and test services with
the DEKRA laboratories!
Find out more in our
press release.
News:
Titanium alloys and titanium purity of medical instruments and implants according to
test laboratory
for materials testing, product testing & failure analysis.
Your specialist for metals,
plastics, elastomers.
We are expanding
our material know-how
and test services with
the DEKRA laboratories!
Find out more in our
press release.
News:
Titanium alloys and titanium purity of medical instruments and implants
according to DIN EN ISO 832
Accredited test laboratory
to DIN EN ISO / IEC 17025.
Your specialist for metals,
plastics, elastomers.
EDX analysis with SEM / microanalysis
A scanning electron microscope (SEM) is an electron microscope in which an electron beam is guided (rastered) in a certain pattern over the object to be enlarged and interactions between the electrons and the object are used to generate an image. The images generated with a scanning electron microscope are three-dimensional images of the object surface and have an extremely high depth of field.
We use the scanning electron microscope with EDX analysis / microanalysis for:
- Failure analysis, fracture analysis, wear analysis
- Damage by corrosion
- Damage caused by the effects of chemicals and other media on metals, plastics and elastomers
- Material determinations, analysis of surfaces
- Particle analysis
- Checking the manufacturing quality
Damage analysis, breakage analysis, wear analysis
Using EDX analysis with SEM, traces of wear in a ball bearing can be shown vividly.
This is an important criterion for assessing damage.
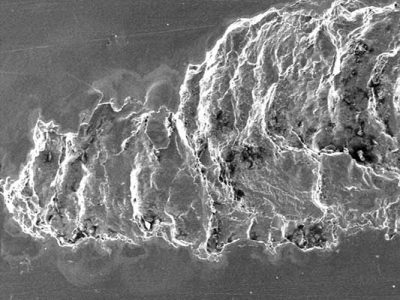
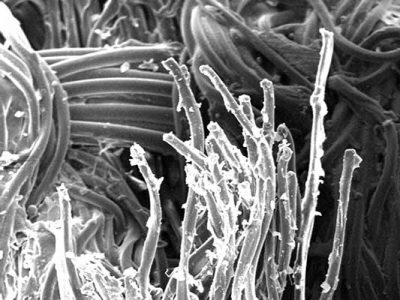
Signs of wear on a ball bearing
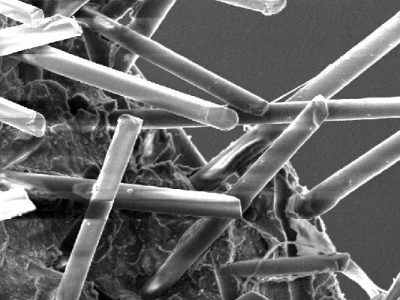
Breakage of a glass fiber-filled polypropylene (PP)
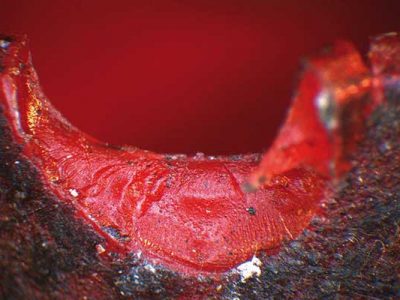
Classic brittle fracture with brittle fracture paths in a PA 6 part (stereo microscope)
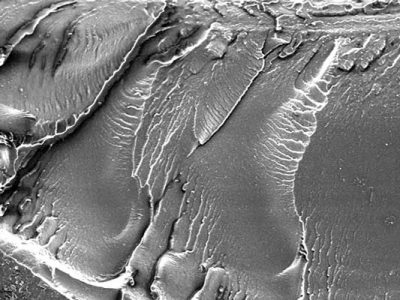
Classic brittle fracture with brittle fracture paths in a PA 6 part (detailed view, SEM)
Corrosion damage
Corrosion occurs when a metallic material reacts with its environment and this reaction causes a measurable change in the material and can lead to an impairment of the function of a metallic component or an entire system.
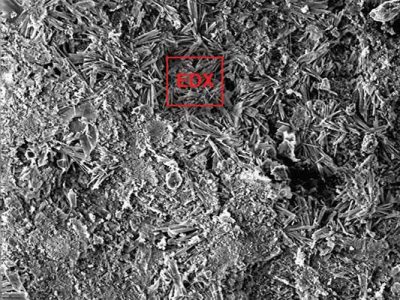
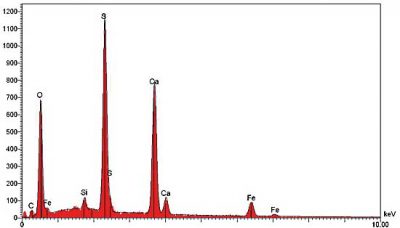
The photo shows a heavily attacked, corroded surface of an exhaust pipe. The composition of the covering was determined using EDX analysis (graphic).
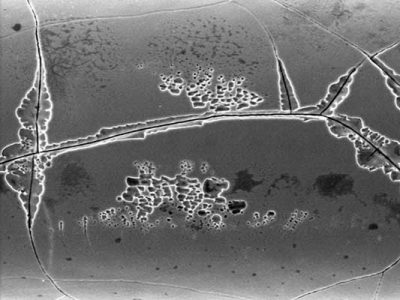
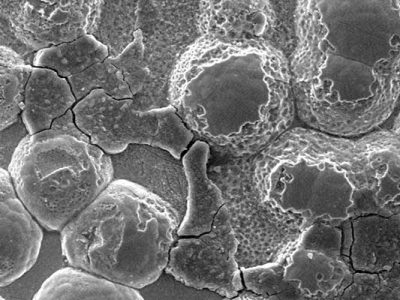
The images show that even chromium layers, which normally provide good protection against corrosion, can be attacked by strong acids.
Damage caused by the effects of chemicals and other media on metals, plastics and elastomers
Components are exposed to various chemicals (grease, lubricants, coolants, solvents, cleaning agents) during their use.
These can trigger stress cracks in materials.
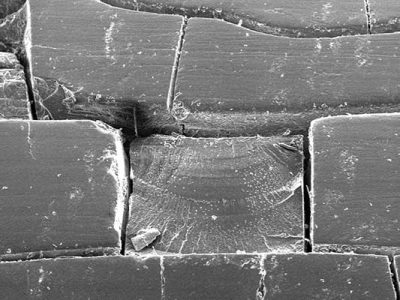
Crack formation in a PU hose due to media.
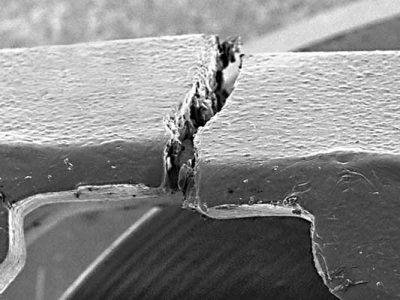
Stress crack in plastic. Polycarbonate is particularly sensitive to solvents such as toluene and propanol.
Material determinations, analysis of surfaces
Even tiny surface defects such as bubbles or craters can impair the visual impression when painting and coating components. While paint craters are caused, for example, by trace contamination with fats, oils or release agents, specks, pimples or other point elevations in the paint surface are often caused by the inclusion of foreign particles (dust particles, hair, fibers, metal abrasion).
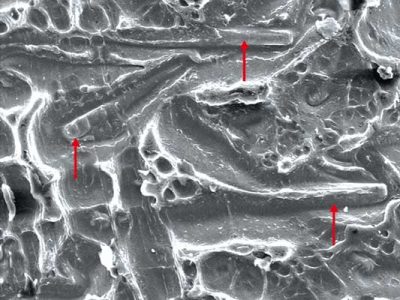
Glass fibers on the surface of a plastic part
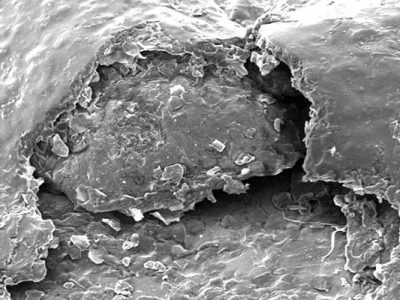
Blistering on a paint surface
Particle analysis
The smallest particles can be to blame for the premature failure of a component. The IR microscope gives us useful results for particles up to 15 µm. Nevertheless, the use of a scanning electron microscope and EDX analysis is essential for inorganic substances.
The EDX analysis detects the smallest elements that are contained in a sample. Electron microscopes are used for this, as they allow a significantly greater depth of field than light microscopes. For example, we can prove whether the particle is an impurity (foreign particle) or a filler particle that is too large.
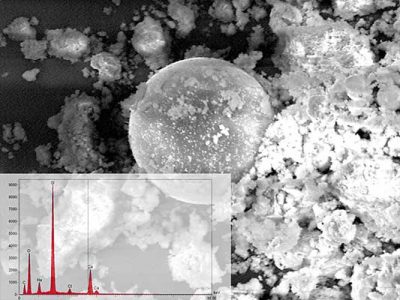
EDX analysis of a glass ball in an inorganic additive from a 1-component adhesive
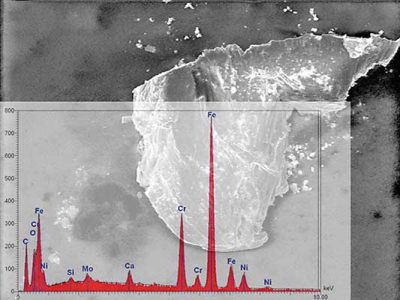
Iron particles made from stainless (high-alloy) steel
Checking the manufacturing quality
The EDX analysis with SEM can also be used to check production quality, for example in the area of initial sample and series testing of components or assemblies.
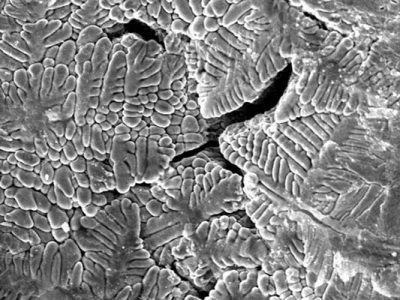
Dendritic structures - created by impurities in the molten metal
