We are expanding
our material know-how
and test services with
the DEKRA laboratories!
Find out more in our
press release.
News:
Titanium alloys and titanium purity of medical instruments and implants according to
test laboratory
for materials testing, product testing & failure analysis.
Your specialist for metals,
plastics, elastomers.
We are expanding
our material know-how
and test services with
the DEKRA laboratories!
Find out more in our
press release.
News:
Titanium alloys and titanium purity of medical instruments and implants
according to DIN EN ISO 832
Accredited test laboratory
to DIN EN ISO / IEC 17025.
Your specialist for metals,
plastics, elastomers.
Layer thickness measurement in cross section according to EN ISO 2808.
The layer thickness is the material thickness of one or more coatings on a substrate. A coating can be of organic origin – for example a lacquer layer – or of inorganic origin, for example the metal layer of an electroplating process.
Whatever the purpose of a coating – a layer thickness measurement is required for a wide variety of coatings and is used for quality control. It takes place both in the incoming goods inspection, during the manufacturing process and in the final inspection.
There are various methods of measuring the layer thickness, whereby we use the microscopic layer thickness measurement method in the cross section, which is often used as an arbitration procedure for checking and calibrating all other layer thickness measurement methods.
Process of a layer thickness measurement in the cross section:
To prepare a cross-section, a sample is taken from the part to be examined, embedded in mounting, ground and polished. Since this destroys the part to be examined, comparable reference objects should also be available.
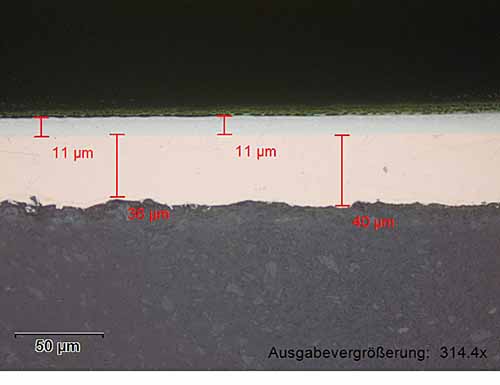
After the sample preparation, the thickness of the coating can be measured at a certain magnification.
The layer structure can also be measured if several layers are present, provided that these can be visually differentiated and displayed.
The measurement is independent of the composition of the layer and the base material.
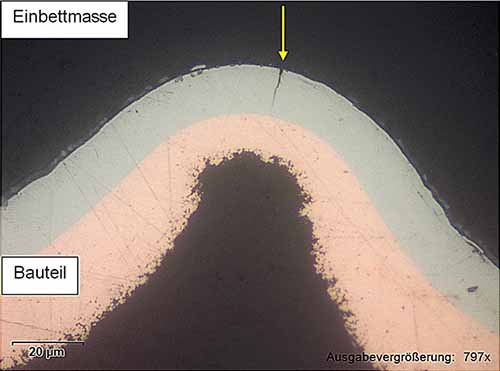
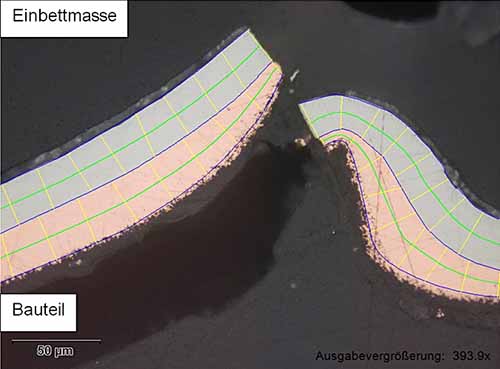
In addition, it is also possible to assess the coating (defects due to inclusions, flaking, etc.).
Case studies: Determination of layer thicknesses of galvanized plastic parts on the stereomicroscope

Figure 1: From bottom to top: substrate-copper-nickel

Figure 2: The nickel layer cracks in the area of the tool separation (arrow)


